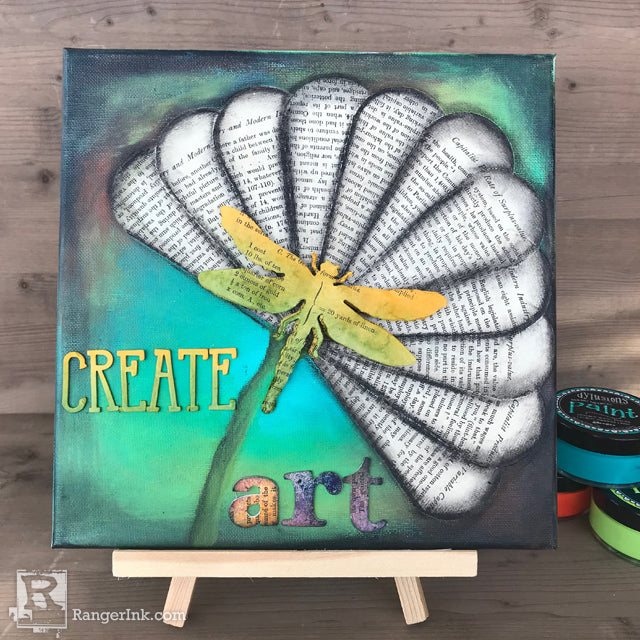
Hi there inky crafters! Are you excited to make a mess and try all the new stuff coming to Ranger? I know I am… Nicole here and I am excited to be sharing a little mixed media fun. This is my first time using Dylusions Paints on a canvas. I’m not trying to reinvent the wheel here, but maybe you have been thinking of trying these paints. Or perhaps you haven’t cracked one open in some time. Follow along as I learn how to use these paints… and get ready to make a mess!

Adventures in Dylusions Paints by Nicole Wright
- Materials
- Instructions
- Dylusions Paint: Fresh Lime, Dirty Martini, Vibrant Turquoise, Tangerine Dream, Black Marble
- Dylusions Ink Sprays: Mushy Peas, Lemon Spray, After Midnight, Rose Quartz
- Tim Holtz Distress® Crayons: Black Soot
- Tim Holtz Alterations by Sizzix- Word Play XL
- Tim Holtz Alterations by Sizzix- Layered Dragon Fly
- Tim Holtz Alterations by Sizzix- Petal Drop
- Tim Holtz Alterations by Sizzix- Broadway XL
- 10x10 Canvas
- Sponges
- Paintbrush
- Baby Wipes
- Book Pages
Instructions

Step 1: I am stretching out with these new to me paints and I have to say… what have I been waiting for. I’ll admit I have been intimidated but wow these are amazing. I cut up some make up sponges to apply the paint to the canvas and get your fingers in there!

Step 2: Smearing around with your fingers helps blend and smooth the paint. These paints dry fairly quickly so it’s easy to layer more colors. A baby wipe works wonders for blending as well.

Step 3: Don’t be afraid to build up those colors. These paints make it easy to pop up the colors and fix any mistakes ummm blemishes along the way.

Step 4: Using the Sizzix die petal drop to cut my pages from my art journal book from 1902. These pages come in handy for all sorts of projects. Apply clear gesso to each petal to create a big flower.

Step 5: With the clear gesso dry you can enhance the petals with distress crayon black soot. Simply outline each petal and smudge. I hand painted the stem for the flower blending the paints to create highlights and shadows. A little feathering can really make an impact.

Step 6: Break out the stains to add some vibrant color to the layered dragonfly die cut and letters. Place and attach.

Step 7: I have to say… I am a fan of the Dylusions Paints! Oh my, I cannot wait to explore more colors, layers and generally inkiness!

Step 8: Take a walk on the wild side this year and embrace the vibrant


