In this tutorial, Cheiron Brandon shows you how to add festive shimmer and shine to your projects with Distress Mica Crayons and Stains.

Distress Festive Shimmer Holly Card by Cheiron Brandon
- Materials
- Instructions
Tim Holtz Distress® Christmas Mica Stains (Set 4)
Tim Holtz Distress® Christmas Seasonal Crayons
Tim Holtz Distress® Watercolor Cardstock
Tim Holtz Distress® Archival Ink: Black Soot, Hickory Smoke
Tim Holtz Distress® Detailer Waterbrush
Tim Holtz Distress® Sprayer
Ranger Non-Stick Craft Sheet
Ranger Ink Blending Tool
Tim Holtz Distress® Ink Pad Frayed Burlap
Ranger Artist Brushes
Other:
Tim Holtz® by Stampers Anonymous Splat Box
Tim Holtz® by Stampers Anonymous Stamp Set CMS459 Festive Collage
Tim Holtz® by Stampers Anonymous Stamp Set CMS458 Department Store
Tim Holtz® by Stampers Anonymous Stamp Set CMS456 Holiday Sketchbook
Tim Holtz® by Tonic Studios Glass Mat
Hello there, creative friends! It’s Cheiron Brandon, and I am back with another tutorial using Tim Holtz products. This month, I am combining the new Seasonal Distress Mica Stains and Mica Distress Crayons to create a card that really shines for the holidays.

First, gather up your supplies! We will be using Distress Mica Stain Set 4, which contains Merry Mint, Cocktail Party, and Shiny Bauble, along with the Distress Crayon set with the same colors.

Step 1: Using Hickory Smoke Distress Archival Ink, stamp images from the Department store stamp set on a panel of Distress Watercolor Cardstock measuring 4 x 5 1/4.

Step 2: Spray Distress Mica Stains in Cocktail Party, Shiny Bauble, and Merry Mint onto a non-stick craft sheet.

Step 3: Spray the stains with water until you get large droplets.

Step 4: Press your paper straight down into the droplets and lift up. Don’t move it side to side, this will just blend all the stains together. Dry with Heat Tool and add more layers if you wish.

Step 5: Add Frayed Burlap Distress Ink to dried inky panel. I also added some stitching.

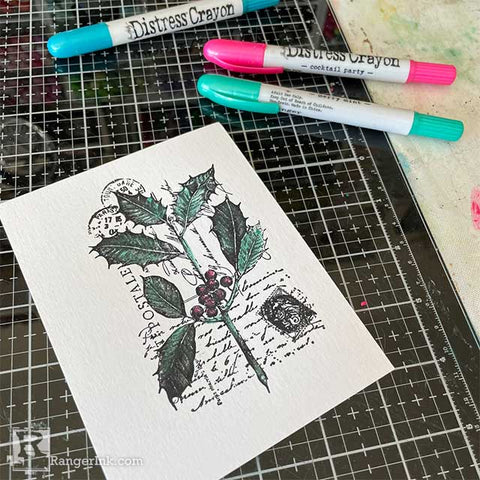
Step 6: Stamp holly from Festive Collage stamp set onto another watercolor panel using Black Soot Distress Archival Ink and color in with Distress Crayons in Cocktail Party and Merry Mint using a Detailer Waterbrush. I like to scribble the crayon onto my Non-Stick Craft Sheet and pick up this way using the brush to add the pigment to my project.

Step 7: Add some water to the Merry Mint Distress Crayon pigment on your craft sheet using a Distress Sprayer. Pick up the pigment with a paintbrush and splatter over the colored image. Let dry or dry with Heat Tool.

Step 8: Spray another piece of Distress Watercolor Cardstock with Shiny Bauble Distress Mica Stain (this will be to mat your colored image on). Dry with Heat Tool while adding water and more spray if need until you achieve your desired look.

Step 9: Dry with Heat Tool while adding water and more spray if needed until you achieve your desired look.

Step 10: Trim your image panel and ink the edges with Frayed Burlap Distress Ink. Trim your Shiny Baubles Panel to fit as a mat for your image. I also added stitching.

Step 11: Stamp and emboss your sentiment in white. Finally, add your inked panel, stamped panel, and sentiment to an A2 (4 1/4 x 5 1/2) card base.


