by Audrey Pettit

Jack-O-Lantern Wall Hanging by Audrey Pettit
- Materials
- Instructions
- Tim Holtz® Distress Marker Gathered Twigs
- Tim Holtz® Distress Spray Stain Antiqued Bronze
- Tim Holtz® Distress Ink: Black Soot, Hickory Smoke, Brushed Corduroy, Shaded Lilac, Dusty Concord, Ripe Persimmon, Spiced Marmalade
- Tim Holtz® Distress Glitter Rusty Hinge
- Ranger Heat it™ Craft Tool
- Ranger Non-Stick Craft Sheet™
- Ranger Mister
- Ranger Mini Blending Tool
- Tim Holtz Distress® Rock Candy Crackle Paint
- Ranger Multi-Medium Matte
- Ranger Watercolor Paper
Instructions

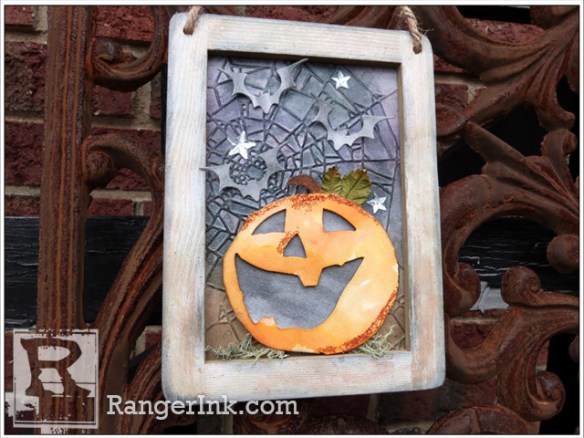
Create some spooky fun this Halloween with a custom handmade piece of home décor.

Frames like this are readily available in the unfinished wood section of your local big box craft store, and are so perfect for all kinds of projects. They can be covered, papered, or painted, and they work beautifully with Distress Inks, paint, Spray, and Stain. Better yet, they cost pennies compared to their expensive boutique store counterparts.
 Love that you can create a frame for any season or holiday, but today, we’ll be making a spooky Halloween project using some fun new dies and embossing folders from Tim Holtz. Let’s get started.
 1. To begin, remove the hanging string from the unfinished wooden frame, and set it aside for now. Cover the front and sides of the frame with Picket Fence Distress Paint.
 2. While the Picket Fence Paint is still wet, apply a bit of Frayed Burlap and Brushed Pewter Distress Paints to the frame. Don’t cover the entire frame, but just randomly dab both colors onto some areas. To keep your paints from becoming contaminated, dab the paints onto a Non-Stick Craft Sheet, and pick them up with a foam brush. Allow the frame to dry completely.
 3. Lightly spray the frame with Antiqued Bronze Distress Spray. Using a clean cloth or an almost-dry baby wipe, rub the spray stain around on the frame. With all these layers of paint and spray, you’ll create a great shabby looking patina on your frame. Then ink the edges of the frame with Black Soot Distress Ink using an Ink Blending Tool.
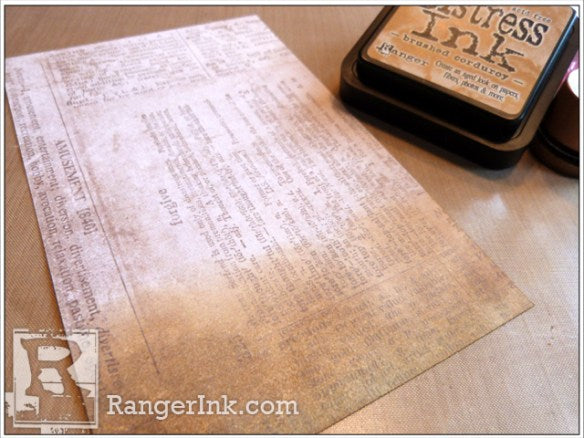
 4. Cut a piece of text-print patterned paper to fit the inside of the frame. Using an Ink Blending Tool, apply Brushed Corduroy Distress Ink across the bottom of the paper.
 5. Apply Hickory Smoke Distress Ink above the brown ink. Make sure you blend the inks together using the Ink Blending Tool.
 6. Continue working up the paper, blending first Shaded Lilac, then Dusty Concord, and finally ending with Black Soot Distress Ink at the top of the paper.
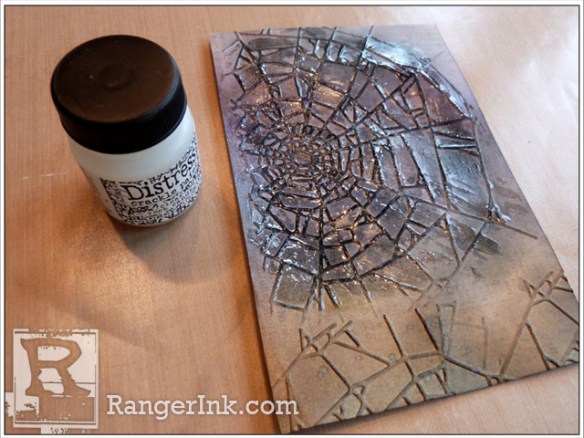
 7. Emboss the inked paper with the Cobwebs Texture Fades Embossing Folder. If your paper is longer than the folder, don’t worry. Simply emboss the paper a second time with only the bottom portion inserted into the folder. The lines won’t match up exactly, but that’s ok, as most of the bottom portion will be covered by the pumpkin anyway. Ink the raised embossed area with Black Soot Distress Ink using the blending tool.
Dab Black Soot Distress Ink onto the craft sheet and spray it liberally with water. Pick up the ink mixture with a paintbrush, and flick the ink onto the embossed paper. Allow to dry, or heat with a heat tool.
 8. Apply Clear Rock Candy Distress Crackle Paint onto the cobweb pattern. And then set the paper aside to dry completely. Once it’s dry, slip the paper into the frame.
 9. In the meantime, die cut the largest pumpkin from Ranger Watercolor Paper using the Jack-o-Lanterns Bigz Die. Dab Spiced Marmalade and Ripe Persimmon Distress Inks onto the craft sheet. Spray the inks with water, and then press the front of the pumpkin down into the ink mixture. Twist the die cut slightly to make sure the entire surface gets covered in ink. Allow to dry, or speed up the process with a heat tool.
 10. Color the pumpkin steam brown with a Gathered Twigs Distress Marker. Ink the edges with Brushed Corduroy Distress Ink using the Ink Blending Tool.
 11. Apply Multi Medium Matte to some areas of the pumpkin with a small paintbrush. I went around the top, the side of the nose, and one bottom corner of the pumpkin. Sprinkle the medium with Rusty Hinge Distress Glitter. Shake off the excess, and allow the medium to dry.
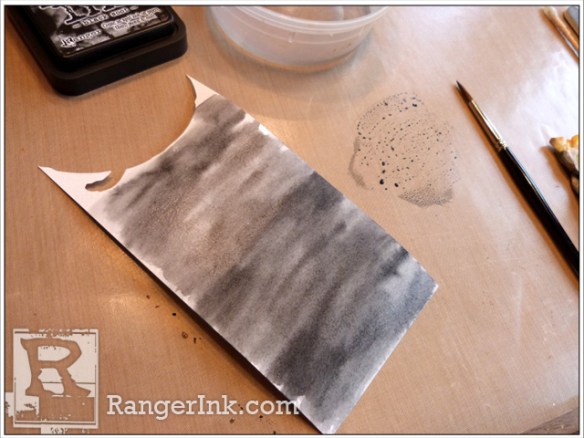
 12. Wet a scrap piece of watercolor paper liberally with a paintbrush. Dab Black Soot Distress Ink onto the craft sheet, pick the ink up with the wet paintbrush and paint the entire surface of the watercolor paper. You need an area big enough to back the pumpkin die cut, as well as some extra for die cutting several bats. Allow the paper to dry.
 13. Apply foam adhesive to the back of the pumpkin, and adhere it to the colored watercolor paper. Trim around the edges to remove any excess paper. Add additional foam adhesive to the back of the pumpkin, and adhere it to the bottom of the frame. Apply Multi Medium Matte to the base of two paper leaves, and tuck them around the pumpkin stem.
 14. Die cut three bats from the remaining watercolor paper using the Mini Bat & Skull Movers & Shapers die set. Lightly bend the wings of the bats upwards. Apply a dab of Multi Medium Matte to the back center of the bats, and then adhere them to the top of the frame. Adhere mirrored stars around the bats using the Matte Medium.
 15. Adhere moss around the bottom of the pumpkin using Multi Medium Matte.


