by Anita Houston

Lucky Dog St. Patrick’s Day Card by Anita Houston
- Materials
- Instructions
- Tim Holtz® Distress Crayons : Mustard Seed, Twisted Citron, Mowed Lawn, Broken China, Hickory Smoke, Antique Linen, Black Soot, Picket Fence
- Ranger Mini Blending Tool with Foam
- Palette Knife Set
- Tim Holtz® Distress Sprayer
- Dylusions Paint Pens : White Linen
- Tim Holtz® Distress Mixed Media Archival Ink Palette
- Tim Holtz® Distress Watercolor Cardstock
- Tim Holtz® Woodgrain Cardstock
- Tim Holtz® Waterbrush : Detailer Brush, Broad Brush
- Ranger Adhesive Foam Rolls : Black
- Ranger Adhesive Strips
- Ranger Multi-Medium : Matte
- Ranger Glossy Accents™
- Tim Holtz Stamper
- Tim Holtz by Stampers Anonymous Collection Layering Mini Stencil: Arrows (Set 15), Bubble (Set 5), Chevron (Set 11)
- Tim Holtz by Stampers Anonymous Layering Stencil: Splotches, Industrial
- Sizzix Tim Holtz Framelits: Crazy Dogs
- Sizzix Tim Holtz Paper Punch: Medium Shamrock
- Tim Holtz idea-ology: Typed Tokens, Long Fasteners
- Trimmer
- Craft Pick
- Stamping Block
- Die Cut Machine
Instructions

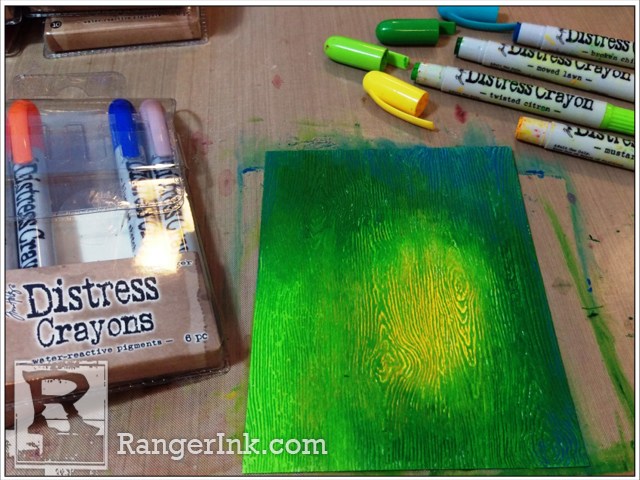
Step 1: Using a piece of Woodgrain Cardstock and Distress Crayons, color in a Mustard Seed circle in the middle of the card. Smudge it out with a warm finger. Color Twisted Citron around that, and again smudge in and blend with the Mustard Seed. Repeat again, using Mowed Lawn, and finishing with Broken China until all the card is colored.

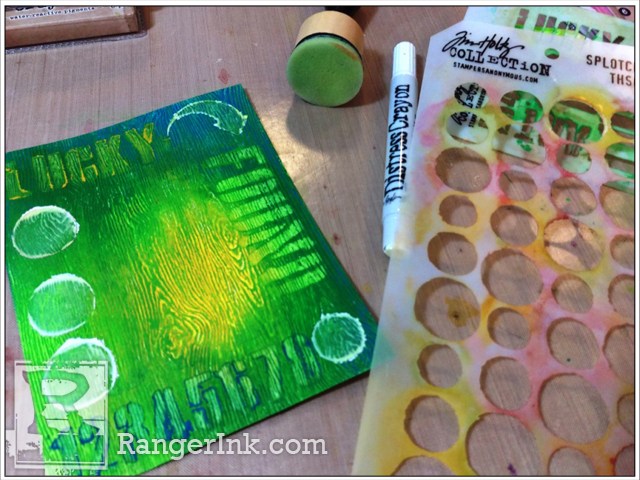
Step 2: Shave off about 1/8 inch of Mustard Seed with a palette knife. Add two squirts of water, and grind it up with the palette knife until a thick paint-like paste is made. Using a clean Blending Tool, soak up the paste. Lay the Industrial Stencil at the top of the card, and stencil in the word “Lucky.” The crayon blends with the color underneath, and make a yellow border around the word. Clean the foam with water. Do the same with Twisted Citron, and the word “Found” along the right side, and again with Broken China and the series of “numbers” along the bottom edge.

Step 3: Again, slice off 1/8 inch of Picket Fence, add two squirts of water, and grind up with the palette knife. Soak it up with a clean foam, and lay the Arrows stencil in the upper right corner next to the word Lucky, and stencil in an arrow. Take the Splotches stencil and stencil in three larger circles on the left side, and one smaller in the lower right corner. Clean the foam.

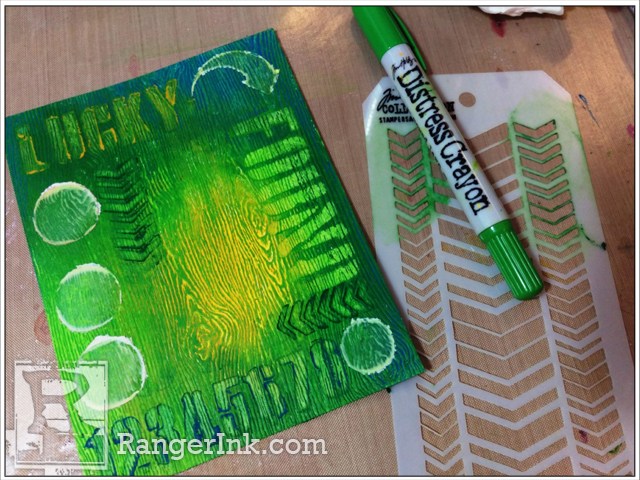
Step 4: Grind up some Mowed Lawn, and soak it up with the foam, and stencil in the smaller portions of the Chevron Stencil as shown. Clean the foam.

Step 5: Lay the Bubble Stencil over the card, and this time scribble Mustard Seed randomly over the stencil, not moving it. Use your warm finger to stencil in the color. Dry the card thoroughly.

Step 6: Shake and prime the White Paint Pen. Trace around the words on the card to make them pop.

Step 7: Using a scrap of Watercolor Cardstock the length of the card, color it with Mowed Lawn and Twisted Citron, and blend together with the Broad Waterbrush. Trim off about 1/4 inch and use scissors to fringe the piece, creating a grass-like look. Punch out about four of the shamrocks with the rest. Ink the edges of both of these with Vintage Photo Archival.

Step 8: Trim the card into four random pieces, making sure the words and numbers are complete on each piece. Trim another piece of Watercolor Cardstock 4.25×5.5 inches to be used as a backing. Add strips of adhesive to the back of the four pieces of card, and adhere them on the Watercolor backing as shown, so now the card is horizontal. Use a Craft Pick to make holes for the Long Fasteners, which go between the letters of “Lucky,” along the rest of the top of the card, and along the bottom edge. Using a Detail Waterbrush and the Broken China Distress Crayons to color in the edges of the white Watercolor backing.

Step 9: Stamp the bulldog in Black Soot Archival onto more Watercolor Cardstock twice, color in the bulldog and coordinating pieces with Distress Crayons and the Detail Waterbrush using the Craft Sheet as your palette, by directly scribbling on the Crayons and picking it up with the brush.

Step 10: Die cut the pieces out using the coordinating Framelits, and assemble with Foam Tape. Color in the Typed Token with Mowed Lawn, and rub off the Crayons that are not in the recessed areas. Attach this to the collar using another Long Fastener. Attach the dog to the card using Foam Tape, and the grass to the bottom edge using Multi Medium. Mount this on a black card backing cut 4.5×5.75 inches using Adhesive Strips. Add the shamrocks to the circles using Multi Medium, and one next to the dog using Foam Tape.


