Nothing says heart and home like handmade decor. Guest artist Shelly Hickox shares a tutorial for a perfectly shabby vintage style memo board that is easy to create and enjoy!

Shabby Metal Flowers Memo Board by Shelly Hickox
- Materials
- Instructions
- Ranger Heat it™ Craft Tool
- Weathered White
- Ranger Emboss It™ Dabber
- Ranger Artist Brush Set
- Ranger Non-Stick Craft Sheet™
- Tim Holtz Sizzix Alterations dies: Tattered Florals, Mini Tattered Florals, Garden Greens
- Tim Holtz Sizzix Vagabond
- Tim Holtz Idea-ology Menagerie Paper Stash
- Tim Holtz Idea-ology Clip, Long Fasteners
- Metal Tray
- Plate Stand
- Aluminum Flashing
- Magnets
- Heavy Duty or Hot Glue
Instructions
 This project is a double-duty décor piece – in the kitchen, it can hold your favorite recipes while you’re cooking. Elsewhere, it can double as a display and memo board. It’s a fun and inexpensive project that is perfect for spring decorating.
 The materials we’ll be using for the base of our project are a metal tray from the dollar store, a metal easel/display stand (found at Walmart), and an idea-ology metal clip.
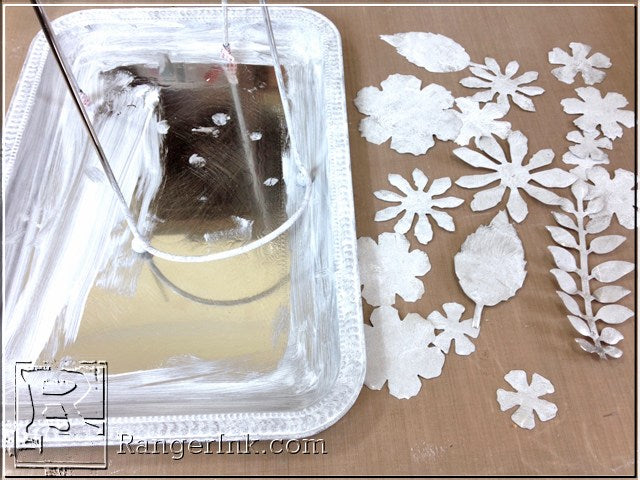
 Begin by cutting various flowers out of aluminum flashing using Sizzix Tattered Florals and Garden Greens dies. Note: aluminum flashing can be found in your local hardware store. You can also substitute craft metal or even disposable foil baking pans. Be very careful of sharp edges – wear gloves if needed.
 Paint all floral elements with gesso. Let dry.
 While floral elements are drying, paint the edges of the tray and the stand with gesso. Set aside to dry completely.
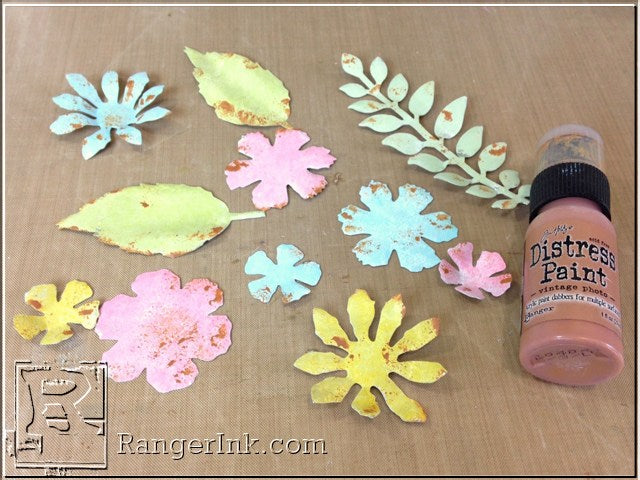
 When floral elements are dry, paint with Distress Paint Dabbers. Dab lightly with a paper towel so that some of the white gesso shows through.
 While flowers are drying, adhere paper from Menagerie collection to the center of the tray using Glue ‘n Seal. When dry, cover entire tray with Picket Fence Distress paint and wipe off, creating a soft and worn look.
 To give the appearance of rust, lightly dab Vintage Photo Distess paint randomly on flowers. Let dry.
 Next, use Emboss It Dabber to randomly apply embossing ink to various areas of the flowers. Cover with Weathered White embossing powder and heat to melt powder. Repeat the ink application, but this time, sprinkle with Vintage Photo Distress embossing powder. Heat to melt. This will give the flowers the look of rust!
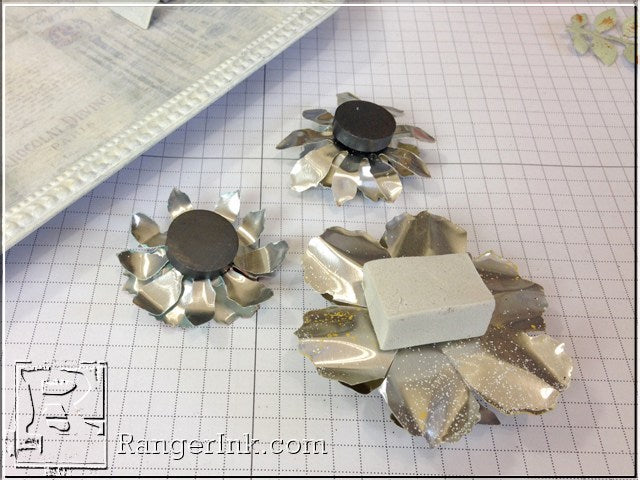
 Punch holes in the center of the flowers and assemble as desired, using a long fastener to connect them. Adhere a magnet to the back of the two smaller flowers, and a piece of foam to the back of the larger flower.
 To complete the tray, punch two holes in the top center and attach clip.
 Glue the large flower to the corner of the tray, placing the sprig of greenery behind it. Add the magnets and you’re done!


