Designer Jenn Shurkus shares a color and texture filled mini book that is packed full of technique in this guest tutorial.

Unique Stencil Technique Mini Book by Jenn Shurkus
- Materials
- Instructions
- Dina Wakley Media Stencils & Masks: Affirmations, Spinners, Tracks
- Tim Holtz® Distress Spray Stains: Spiced Marmalade, Peacock Feathers, Picked Raspberry, Vintage Photo
- Tim Holtz® Distress Ink Peacock Feathers
- Dina Wakley Media Palette Knife
- Dina Wakley Media Brushes
- Ranger Mini Blending Tool
- Ranger Mister
- Ranger Heat it™ Craft Tool
- Ranger Non-Stick Craft Sheet™
- Ranger Texture Paste
- Tim Holtz Idealogy Chit Chat Stickers
- Tim Holtz Idealogy Alpha Parts
- Tim Holtz Idealogy Curio Knob
- Tim Holtz Idealogy Crinkle Ribbon
- Tim Holtz Idealogy Trinket Pins
- Waxed Linen Thread
- Vintage Key
- Painter
- Tim Holtz® Cling Stamps by Stampers Anonymous: Mixed Media
- Tim Holtz® Layering Stencils: Splatters, Honey Comb, School House, Chevron
Instructions
 1. For the cover of the Mini Book we will use one # 12 Manila Tag. Using Dina Wakley Media Gel Medium, brush through a stencil onto your tag. I find using a stiff bristle brush works best so that the Gel Medium won’t seep under the stencil. I am using Tim Holtz Layering Stencil, Splatter.
 2. Once the gel medium is dry, choose Distress Spray Stain Colors.
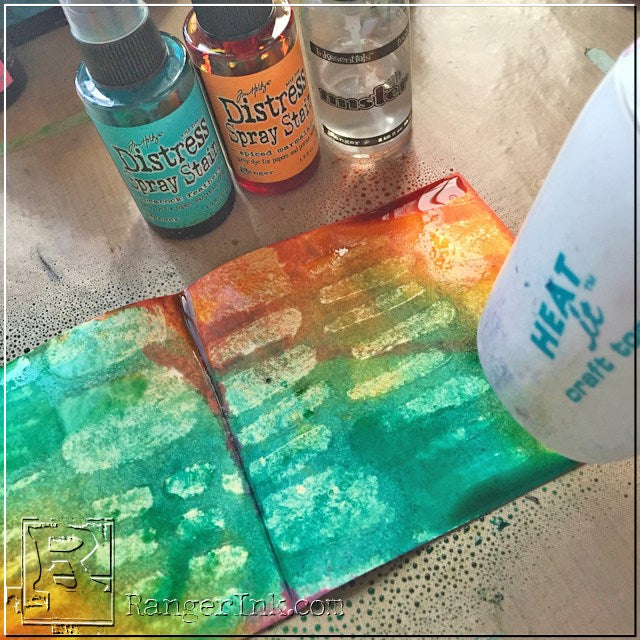
 3. I am using Picked Raspberry, Spiced Marmalade. Spritz colors generously on the tag.
 4. The spritz with water to help blend the colors.
 5. Dry with a heat tool- this will expose the gel medium design.
 6. Here is another tag that I will use for an inner page where I used Dina Wakley Media Tracks stencil on a #10tag. For Distress Spray Stains I used Peacock Feathers and Spiced Marmalade.
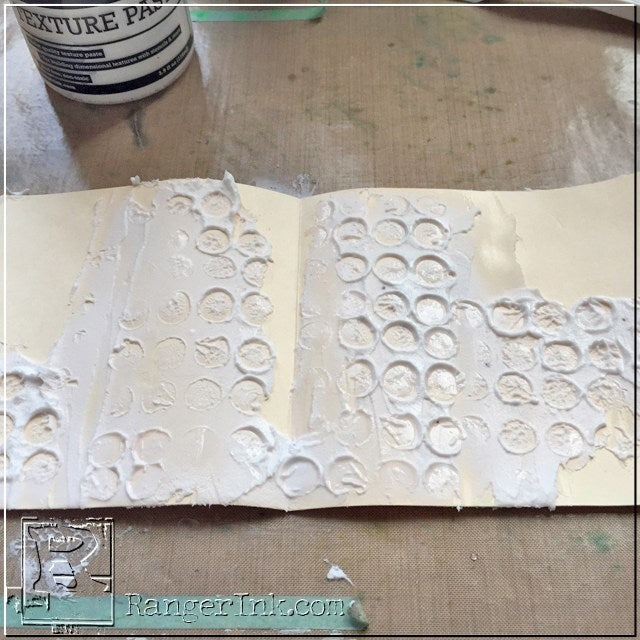
 7. For another interior page I took a #10 manila tag, Texture paste and Mixed Media Cling Stamps.
 8. Start by spreading a generous amount of texture paste here and there on your tag using a palette knife. You don’t need to cover the whole tag.
 9. Spritz your stamp with water and then press the stamp into the texture paste. The water will help prevent your stamp getting paste on it.
 10. Set your tag aside to dry.
 Taking one of the Kraft #10 tags, Texture Paste and a stencil. I used Dina Wakley Media Affirminations.
 11. Using painters tape I taped down my tag, folded in half and the stencil over it.
 12. Spread the paste over the whole stencil that is covering your tag. Set aside to dry.
 13. Do the same with another Kraft #10 tag, but this time only spread texture paste through parts of the stencil
 14. If any paste goes through the stencil where you don’t want to it- you can wipe it away while it is wet.
 15. I usually scrape it with my palette knife.
 16. Taking your tag from step 3 we are going to do the same technique, only using a different stamp from the Mixed Media stamp set.


 17. Set aside to dry.
 18. It is time to add some color to the Kraft tags with the texture paste. Spritz generously the colors you would like. Then heat set. Don’t worry if the tag starts to curl a bit.
 19. If the color isn’t as vibrant as you would like, then go ahead and layer another spritz of the same color and heat set again.
 20. Any extra spray on your mat- spritz with water to pool the color, and pounch manila tags into the color, heat setting in between layers. I did this with several Manila Tags #8.
 21. Take your tag that you stamped into the Texture paste, and generously spritz Distress Stain.

 22. Then heat set. It is so yummy how the color settles into the grooves.

 23. Turn the tag over and do the same. Playing with different color combos.
 24. Color some crinkle ribbon with Distress Stain Spray, and heat set.
 25. Start to figure out what order you would like your pages.

 26. Stack them together.
 27. I kept it simple binding this mini book together, just poke 2 holes along the fold line.
 28. Thread your waxed linen thread through and tie a square knot.
 29. Feed through an antique key, and trinket pin.
 30. Pin into the square knot.
 31. Place a curio knob through the hole from the tag on the cover.
 32. Tie crinkle ribbon on all the tag holes on the interior pages.
 33. Tie a long piece of crinkle ribbon to the curio knob.
 34. Feed through one of the phrases from the Alpha Parts, wrap the ribbon around the book and back to the curio knob where you can wrap it around to hold it close. Pick a few chit chat stickers, ink with your blending tool and Peacock Feathers Distress Ink. Stick them to the cover of your book, and spread a little gel medium on top so they won’t fall off. I just used my finger.


