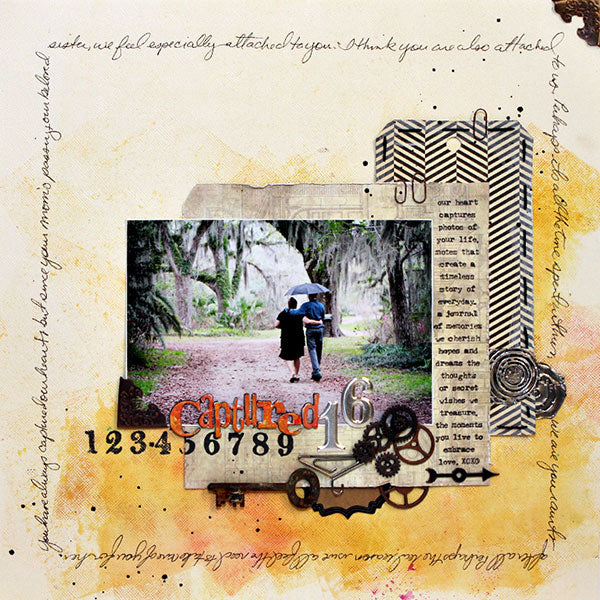
Learn to make a Distress Ink background with a brayer for your next scrapbook page.

Distress Captured Scrapbook Layout
- Materials
- Instructions
- Tim Holtz® Distress Ink Pads: Wild Honey, Worn Lipstick, Mustard Seed, and Tattered Rose
- Tim Holtz® Distress Stains™: Picket Fence
- Archival Ink™ #0 Pads
- Ranger Mister
- Ranger Non-Stick Craft Sheet™
- Ranger Brayers
- Ranger Glossy Accents™
- Stampers Anonymous Tim Holtz® Collection Cling Mount Stamps: Stuff to Say Stamp Set
Instructions
1. To create the background, apply distress ink pads directly to cardstock (Wild Honey, Worn Lipstick, Mustard Seed, Tattered Rose)
2. Spray distress ink liberally with water using Mister bottle then roll ink with a large brayer spreading ink around. Let Dry.
3. Use Distress Black Soot to paint on craft sheet to create a watered down mixture. Using a small round brush, dip into water down mixture and gently tap over cardstock creating little splatters of paint. Let it dry completely.
4. Die cut tag and apply Picket Fence stain around the edge of the tag. Distress tag edges using paper distresser and stitch around the edge.
5. Stamp a 6” x 6” piece of Crowded Attic paper on the very right edge. Distress stamped paper using paper distresser.
6. Add gesso to Ransom alphabet title and let dry. Mix paint on craft mat. Using a paint brush, add paint (Fired Brick, Antique Linen, Squeezed Lemonade ) in a random patterned to gesso letters.
7. Emboss metal foil sheet and add black paint to distress it. Cut out smaller pieces to layer into the layout.
8. Assemble layout by placing tag down first, then patterned paper, and metal foil pieces. Add 4 x 6 photo of your choice with a metal corner to the bottom left corner.
9. Stamp number image to the left of the photo. Add title just to the right of the metal corner.
10. Add in additional embellishments like metal gears, kraft tags, metal numbers, game spinners, etc.
11. Journal in a frame around the edge of the layout and add final metal corner to the upper right corner.


