Ranger Signature Designer Wendy Vecchi joins us today with a fun and festive holiday decor project. Wendy combines her signature inks and embossing powders with a fun mix of surfaces to create a holiday decor piece that would be lovely to display or gift to someone special.

Merry Christmas Home Decor with Wendy Vecchi
- Materials
- Instructions
- Ranger Non-Stick Craft Sheet™
- Ranger Heat it™ Craft Tool
- Ranger Mini Blending Tool
- Ranger Ink Blending Tool & Foam
- Ranger Adhesive Foam Rolls
- Ranger Adhesive Strips
- Ranger Multi-Medium Matte
- Wendy Vecchi Embossing Powder: Red Geranium, Fern Green
- Tim Holtz® Distress Ink Gathered Twigs
- Archival Ink™ Jet Black
- Wendy Vecchi Archival Ink™: Red Geranium, Fern Gree, Tree Branch, Potting Soil, Watering Can
Instructions
 Ink over the base with Fern Green on a blending tool. While the ink is wet, sprinkle on Fern Green Embossing Powder.
 Wipe some of the powder from the edges & heat to emboss.
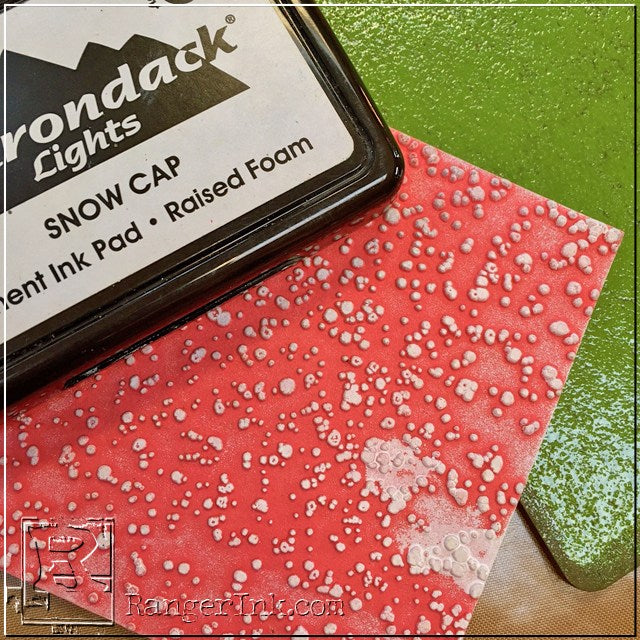
 Ink the spatter stamp with Snow Cap and stamp over the cooled embossing powder to create a faux graniteware effect. Dry.
 Ink the vintage pricing chart stamp with Watering Can and stamp over the base, then dry.
 Ink the base edges with Potting Soil.
 Ink the trimmings with Gathered Twigs to age, then glue to the left side of the base as shown.
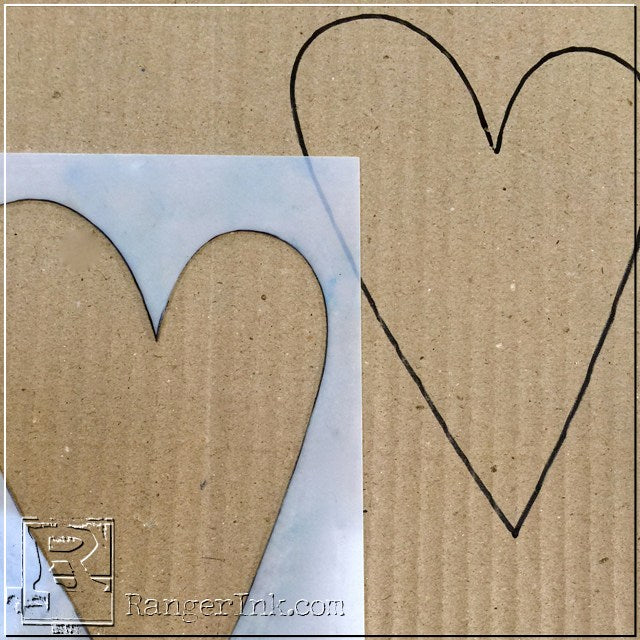
 Trace the large heart stencil onto the back of the cardboard & cut out. Ink the edges with Gathered Twigs.

Lightly swipe the Red Geranium pad over the raised ribs on the front of the heart & sprinkle with Red Geranium Embossing Powder while the ink is wet.

Heat to melt the powder.

Add an Adhesive Strip to the front of the hear.

Add several rows of tinsel twine that has been inked with Watering Can (to age).
 Use the label die to cut the label from a cardstock scrap. Use Jet Black with the mini blending tool to stencil MERRY CHRISTMAS. Add Gathered Twigs to accent the label edges.
Cover a piece of Clearly for Art with a vintage text, using Glue N Seal & dry. Stamp the holly with Jet Black and cut out the holly. Heat to shape the leaves.
 Ink the reverse dots background stamp with Red Geranium & stamp onto a cardstock scrap.
 Punch 3 circles from the red polka dot background to create the berries for the holly. These are a perfect fit inside the small Custom Fasteners.
 Swipe 2 small custom fasteners over the Fern Green pad, then sprinkle with Fern Green Embossing Powder & heat to melt.
 Swipe 2 Mini Fasteners and 2 Long Fasteners over the Red Geranium pad, sprinkle with Red Geranium Embossing Powder & heat to melt the powder.
 Swipe the tip of the small Arrow & a part of a hinge clip over the Red Geranium pad & sprinkle with Red Geranium Embossing Powder, then heat to melt.
Ink the Plaquette with Tree Branch and dry.
 Add black Adhesive Foam to the back of the heart & add to the base.
 Assemble the pieces as shown. The Mini Fasteners accent the label and the Long Fasteners attach the Plaquette to the lower right corner.

NOW…Sit back & admire the art YOU created!
Things to Note:
- Glue N Seal is the BEST adhesive for paper in the whole USA…no WORLD…NO…UNIVERSE!
- Adhesive foam adds just the right amount of LIFT & the adhesive is quite strong!
- If it can take the heat, it CAN be embossed with embossing powders. It’s an easy way to customize embellishments to perfectly coordinate with your project. It’s also an excellent way to update things we’ve had for a bit.
- Heated metal (from embossing) is H O T! Be careful! Tweezers or a hemostat make it easy to hold metal embellishments & keep your fingers safe.
- Snow Cap stamped dots over embossing powders (any color) creates an authentic looking faux graniteware effect.
- Clearly For Art can be heated & RE-HEATED many times to create the perfect dimension.
- Remember that some stencils can make awesome templates.
- This little art can sit in an easel or since it’s lightweight, a magnet could be added to the back…OR…it could easily be changed to the cover for a mini holiday album.
MERRY CHRISTMAS!


