Learn how to make shimmery die cuts for this holiday card using Alcohol Inks.

Shimmery Holiday Card featuring Alcohol Inks by Tammy Tutterow
- Materials
- Instructions
- Ranger Mini Blending Tool
- Archival Ink™ Designer Series: Wendy Vecchi Potting Soil
- Archival Ink™ Jet Black
- Ranger Adhesive Strips
- Ranger Multi-Medium Matte
- Ranger Non-Stick Craft Sheet™
- Ranger Heat it™ Craft Tool
- Tim Holtz® Alcohol Ink Applicator
- Tim Holtz® Alcohol Blending Solution
- Tim Holtz® Adirondack® Alcohol Inks: Aqua, Cloudy Blue, Lettuce, Bottle, Meadow, Pesto, Espresso, Pearl Mixative, Silver Mixative
- Ranger Gloss Paper
- Tim Holtz Sizzix Dies: Holiday Greens
- Tim Holtz Idea-ology: Crinkle Ribbon, Tidings Tokens
- Tim Holtz Ideaology Grid Blocks
- Tim Holtz Sizzix Vagabond & Magnetic Platform
- Tim Holtz® Cling Stamps by Stampers Anonymous: Christmas Nostalgia
Instructions
 Begin by applying two drops of Pearl and one drop of Silver Alcohol Ink Mixatives to the felt of an ink applicator tool.
 Pounce the ink applicator tool randomly over a piece of Glossy Cardstock cut to fit your card front. Rotate the card front as you pounce to help keep the application random. Although this card front looks white, it is actually completely covered with Pearl and Silver.
 Add drops of Cloudy Blue and Aqua Alcohol Ink onto the card front. As you learned last week, blast the ink with canned air to create movement and pattern in the ink. Rotate the card front as you spray the air to move the ink in different directions.
 Add drops of different green inks to the felt. The fresh ink will reactivate the remaining Silver and Pearl inks. (Green inks used: Lettuce, Meadow, and Bottle.)
 Cut a piece of Glossy Cardstock large enough to fit the selected die cuts. Pounce the ink over the cardstock. The light areas of the cardstock is Silver.
 Add a darker shade of green to the felt. (Color shown: Pesto.)
 Pounce the darker green randomly over the cardstock. Allow the new ink to interact with the dried inks on the cardstock. The fresh ink will add a speckling effect where it interacts with the dried inks.
Tip: While you have your inks out and have a color combination you love, go ahead and ink extra pieces of cardstock. You can set them aside for die cutting another day for another project when you don’t have time to ink paper.
 Die cut greenery pieces from the cardstock. (Die shown: Tim Holtz Sizzix Holiday Greens and Sizzix Magnetic Platform.)
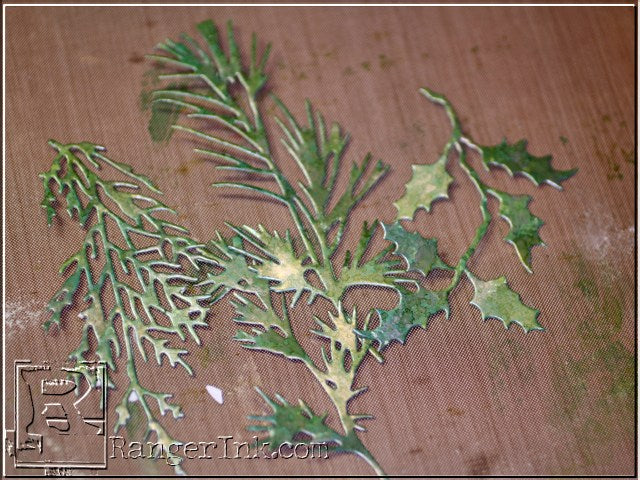 The die cuts will have varying shades of green and a lovely silvery pearl finish.
 To color the branches of the die cuts, place a drop of ink on your craft sheet. Use an Alcohol Ink Blending Pen with Alcohol Ink Blending Solution. Use the pen to pick up the ink. The nib on the pen will soak up the ink. Use the pen to dab and brush the ink onto the branches. You may need to apply several coats to achieve the depth of color you would like.
When you are finished, scribble the marker onto a piece of scratch paper until the nib is clean again.
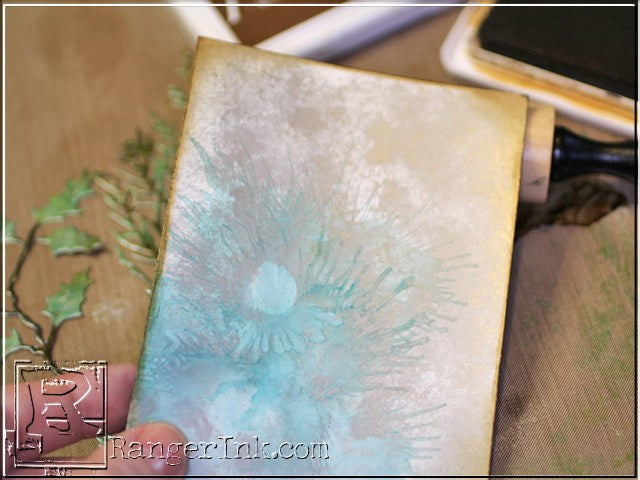 Use an ink blending tool to apply Potting Soil Archival Ink to the edges of the card front.
 Pounce the ink over the tips of the greenery to add additional color to them.
 Ink a stamp with both Jet Black and Potting Soil Archival Inks. Stamp the sentiment in the lower right corner of the card front.
 Dry the ink with a heat tool.
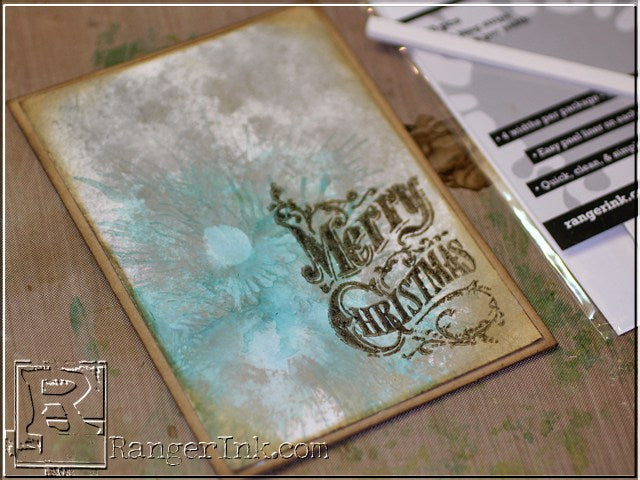 Adhere the card front to the front of a card made from Kraft Cardstock.
 Apply liquid adhesive to the lower part of the greenery pieces.
 Layer the greenery pieces onto the lower left side of the card front.
 Add a dyed Crinkle Ribbon bow to the base of the greenery. (Did you notice that this ribbon is dyed with Silver and Cloudy Blue? Next week I will share how to color Crinkle Ribbon with Alcohol Inks!)
 Use a small piece of thin wire to add a Tim Holtz Tidings Token to the bow.
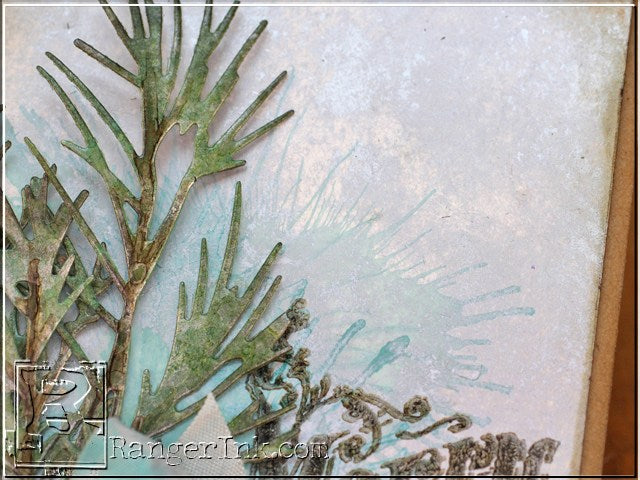 The blasts of color behind the greenery really compliments the shape of the greenery pieces. The color blasts would also look great in green too!
 The Silver and Pearl Mixatives add such a pretty shimmer to the greenery pieces making them feel so wintery!
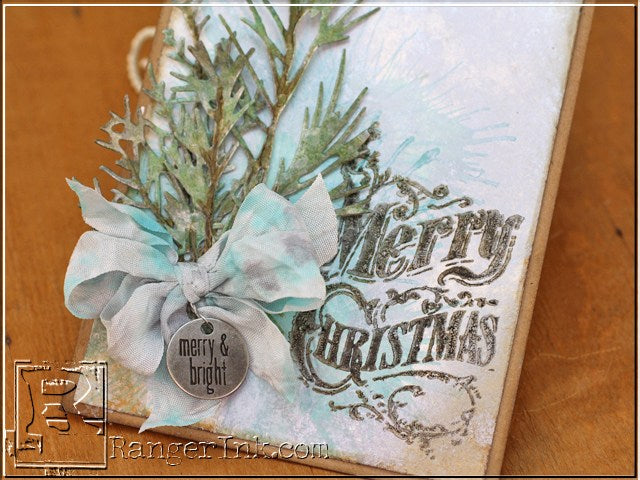 This card is really so easy to create and oh so pretty! The silver reminds me so much of vintage style foil gift wrap. It is so shimmery with a perfect wintery feel!
Your Cart
- Choosing a selection results in a full page refresh.


