By Annette Green

Distress Halloween Postcard
- Materials
- Instructions
- Ranger Non-Stick Craft Sheet™
- Tim Holtz® Distress Stains™: Rusty Hinge
- Tim Holtz® Adirondack® Alcohol Inks: Slate, Pitch Black
- Tim Holtz® Alcohol Ink Applicator
- Tim Holtz® Alcohol Blending Solution
- Tim Holtz® Distress Glitter: Black Soot
- Tim Holtz® Ink Palette
- Ranger Glossy Accents™
- Ranger Emboss It™ Ink Pad
- Tim Holtz® Distress Ink Pads: Wild Honey, Rusty Hinge, Black Soot
- Ranger Ink Blending Tool & Foam
- Archival Ink™ #0 Pads: Jet Black
- Tim Holtz idea-ology-Crowded Attic, Laboratorie & Seasonal Kraft Resist Papers; Grungeboard, Laboratorie Tissue Tape, Label Letters, Halloween Muse Token
- Tim Holtz Alterations by Sizzix -Apothecary Bottles Die; Mini Bat & Skull Movers & Shapers Die; Mini Paper Rosettes Die
- Black Lace Trim
- 4 x 6 Piece of Cream Cardstock
- Cork Sheets
- Waxed Twine
Instructions
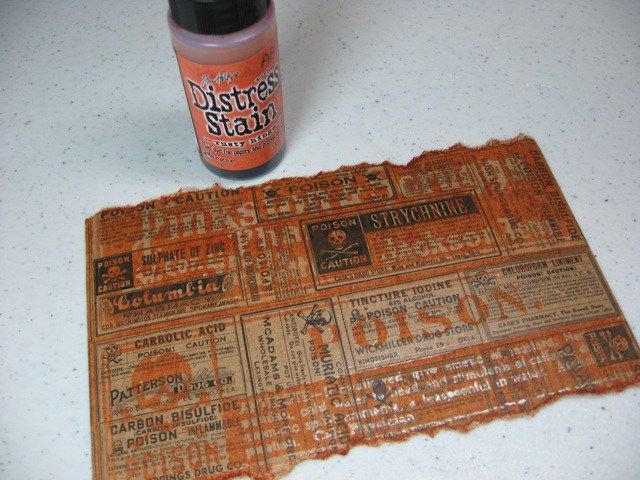
1. Cut a piece of Seasonal Kraft Resist 4 x 6 inches. Tear 1/4-inch off top and bottom edge. Working on the Non-Stick Craft Sheet, cover surface with Rusty Hinge Distress Stain. Let dry.
2. Stamp large skull onto Laboratorie paper with Embossing Ink. Add Black Embossing Powder and heat until shiny.
3. Ink over the skull using a blending tool with foam and Wild Honey Distress Ink to left side of face, then Rusty Hinge on the right. Cut out stamped image.
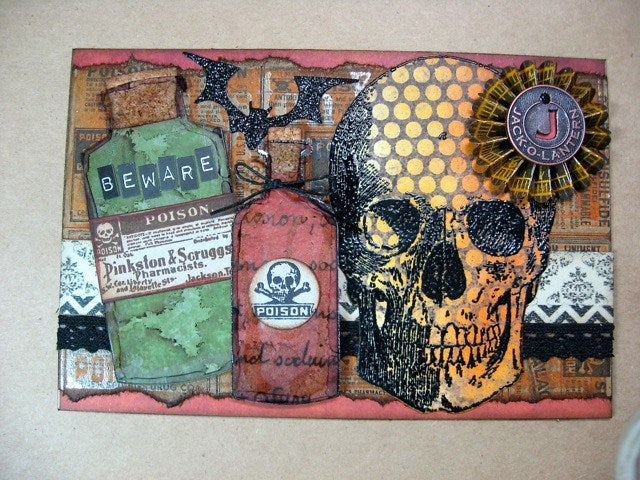
4. Ink edges of Kraft Resist piece with Black Soot Distress Ink and adhere to a 4 x 6 cardstock from Crowded Attic Paper Stash. Add Laboratorie tissue tape and lace trim. Then add skull. (Tissue tape was first adhered to a tan cardstock strip to help it stand out more on this background.)
5. Cut two bottles out of both Shrink Plastic and Crowed Attic papers using the Apothecary Bottles Die. Ink edges of papers with Black Soot Distress Ink.
6. Using a felt pad on a blending tool, apply Slate Alcohol Ink in a pouncing fashion to one side of the Shrink Plastic. Do this to both Shrink Plastic bottles.
7. Using the Alcohol Ink Fillable Pen, pick up some Pitch Black Alcohol Ink from the Ink Palette. (Note: The ink was dispensed into the palette and left to dry. The Alcohol Pen is filled with Blending Solution and is used to lift the dried alcohol ink from the palette so it can be used like an alcohol marker.) Color the outer edges of the Shrink Plastic bottles in a messy, distressed fashion.
8. Adhere Shrink Plastic bottle with alcohol ink side down onto the coordinating paper die-cut bottle using Glossy Accents. Stamp a poison label, cut out, and adhere to front. (I cut the stopper to the bottles with a cork sheet from the craft store)
9. Do the same with the second bottle.
10. Create a mini rosette with Laboratorie ruler paper, inking the top with Rusty Hinge Distress Ink. Add must token with a piece of orange cardstock behind the opening of the letter J.
11. Cut a bat from grungeboard. Apply Glossy accents to bat. Pour Black Soot Distress Glitter over top and return excess glitter back into the jar. Let Dry. Then assemble elements onto postcard. Tie some waxed twine around small bottle’s neck and tie into a bow.
12. Add the letters BEWARE to large bottle.
13. Completed postcard front.
14. Adhere cream cardstock to back of postcard and stamp as desired.


