by Wendy Vecchi

Every Moment Matters Card by Wendy Vecchi
- Materials
- Instructions
- Archival Ink™ Jet Black
- Archival Ink™ Designer Series: Wendy Vecchi - Cornflower Blue, Tiger Lily, Red Geranium, Fern Green, Leaf Green, Watering Can, Tree Branch, Orange Blossom
- Archival DIY Ink Pad with Potting Soil, Tree Branch, Leaf Green and Fern Green Re-inkers
- Dina Wakley Media Palette Knife
- Ranger Mini Blending Tool
- Ranger Ink Blending Tool & Foam
- Ranger Multi-Medium Matte
- Ranger Adhesive Foam Rolls in Black
- Tim Holtz® Alcohol Ink: Cranberry
- Tim Holtz® Distress Markers: Hickory Smoke
- Tim Holtz® Distress Ink Pads: Gathered Twigs, Hickory Smoke
- Ranger Heat it™ Craft Tool
- Ranger Non-Stick Craft Sheet™
Instructions

 1. Die cut the watering can from white Magic Mat Board. Swipe Tiger Lily and Cornflower Blue onto the Craft Sheet. Sprinkle with about 3 drops of rubbing alcohol. DO NOT MIX. Place the watering can die cut onto the ink/alcohol & wiggle around to pick up the color. Dry.

 2. Ink the spatter stamp with Watering Can, then stamp over the watering can to add pit marks. Dry.
3. Add shading to the edges of the watering can & the trim piece with Hickory Smoke, using the Blending Tool. Use the Hickory Smoke marker to cover the white edges.
 4. Use an awl to create a hole to accept the washer and long fastener in the handle area. After inserting the washer with the long fastener, “smack” the fastener with the Texture Hammer to dent & age it. Glue the trim strip in place. Use the black glaze pen to add dots to resemble holes in the sprinkler area.
5. Paint a thin layer of Glue N Seal onto Clearly for Art, add Newsprint & burnish to Adhere the Newsprint to the CFA. Give it a quick dry.
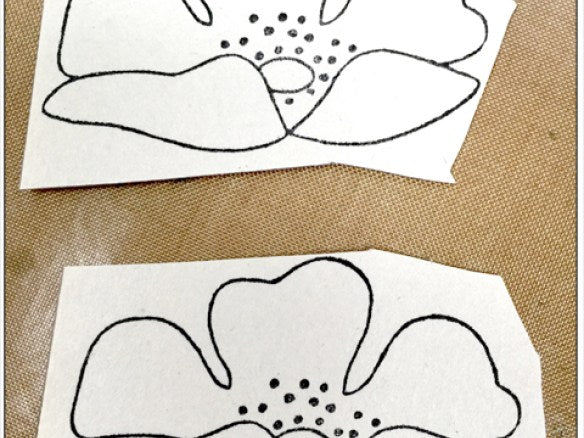
 6. Stamp 2 flowers onto the Newsprint side, using Jet Black. Dry and cut out.
 7. Swipe the Tiger Lily and Red Geranium pads onto the craft sheet. Drip 3 drops of alcohol over the inks. DO NOT MIX.
 8. Place the Newsprint side onto the inky solution & wiggle to cover the flower with ink. Dry. Repeat with second flower to use up the ink. Your flowers will look something like this.
 9. Ink the Polka Dot background stamp with Red Geranium and stamp over both flowers. Heat the flowers to soften and shape. Layer the flowers, using Foam Adhesive.
 10. Add a drop of Cranberry Alcohol Ink to color the gumdrop. Allow to dry. Add the gumdrop to the center of the flower.
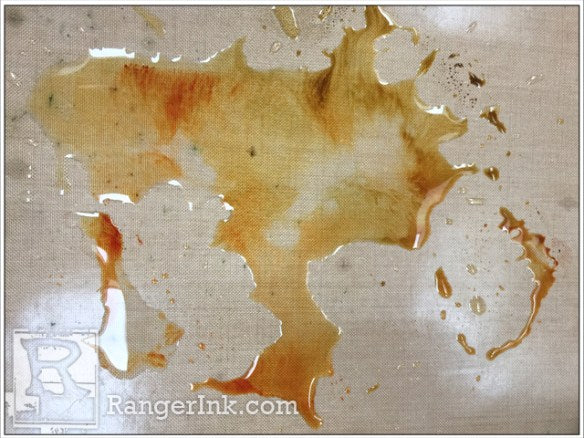
 11. Swipe the Tree Branch & Orange Blossom pads close to each other on the Craft Sheet and sprinkle on rubbing alcohol. The manila cardstock will absorb the fluid, so use plenty.
Use a palette knife or craft stick to mix the ink and alcohol together. Place the manila cardstock into the inky fluid to cover the cardstock and dry.
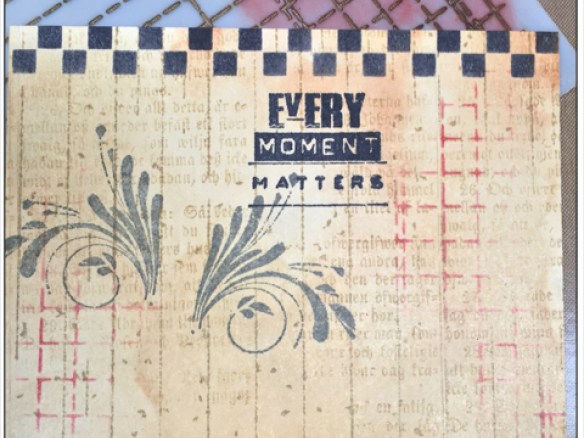
12. Lightly ink the Old Wood Floor stamp with Watering Can and stamp over the card, starting at the top. The bottom will not be stamped.
 13. Use Jet Black to stamp the sentiment about 1/2 inch from the top and a bit to the right.
14. Ink the vintage text stamp with Tree Branch and use the unmounted stamp to randomly add text to the background.
 15. Use Jet Black to stencil 4 rows with the Checkmate stencil at the bottom of the card. Stencil 2 rows at the top, using Jet Black.
16. Use a blending tool with Gathered Twigs to shade the edges of the card.
17. Test drive the placement of the watering can. That will help you decide where to stamp the flourishes. Use Watering Can to stamp the flourishes, so they appear to be sticking out of the can.
 18. Use Red Geranium to stencil 3 small areas, using the Old Ledger Stencil.
 19. Use a Post-It to mask off the top right border of the card, Use Jet Black to stamp the spider & remove the Post-It. (that’s the BLUE in the photo).
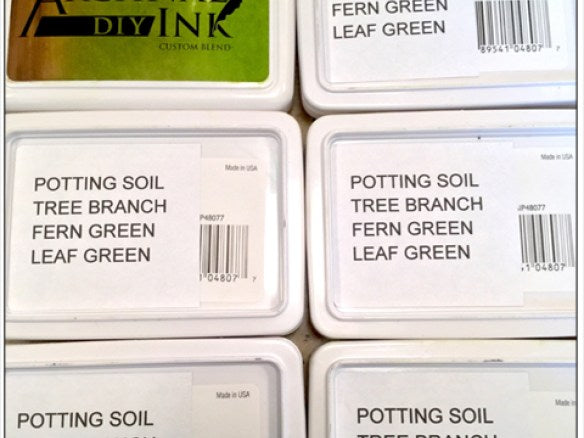
 20. To create the custom Archival pad…see photo…add a thin strip of Potting Soil, then a strip of Tree Branch, then Fern Green and then Leaf Green.
21. Use the custom Archival pad to stamp the leaves and stem onto the Newsprint side of the CFA. Cut out, cutting off the stem. Add Fern Green to shade the edges, using a blending tool.
22. To assemble the card, glue the watering can in place, add the leaves, then add the flower over the leaves and watering can.
 23. Add to a black card base. Add pen stitching detail to the card edges.

Things to Note:
1. Archival inks are versatile. In this project they were used to stencil, to stamp, to create a fluid inky background for the manila cardstock and they were used to create a more “splotchy” effect on the watering can and on the flowers.
2. This is interesting…even though the manila cardstock is completely saturated, because the archival inks were mixed with rubbing alcohol, there is no bubbling, warping or pilling of the manila cardstock or the Newsprint.
3. Rubber stamps and inks are a match, made in heaven. You can totally change the look of the stamp by changing the ink color. The spatter stamp that creates the “pit” marks on the watering can for this card is the same stamp I use with Glacier White pigment ink for the Faux Graniteware technique.
4. The stem/leaves stamp gets transformed by changing it from vertical to using it horizontally & chopping off the stem!
5. Since Archival inks are waterproof, water will not clean the ink from the stencil, but rubbing alcohol works like a charm. Any alcohol percentage is OK. They all work the same.
6. Incase you didn’t know…Glue N Seal is THE BEST paper adhesive in the entire world! Trust me…it doesn’t bubble even very thin papers like my Newsprint.
Here are some little TIPS…
 1. When creating custom pads, mask off the case with painters tape, then swipe the inked pad over the label to use as a reference. Remove the tape & the case is clean.
 2. I find it very useful to label the bottom of the custom pads with the reinker colors that I used to create the pad. It’s a simple way to prevent re-inking with the wrong color. Re-inkers are dark, since they are a very concentrated ink. This makes it difficult to decide if the color is Fern Green or Leaf Green… The same is true with the other colors…Red Geranium or Carnation Red…a simple label is very helpful.


